Hands-On-Green: INSULATING THE RIM JOIST
First, look around the area and get familiar with all the parts. You should see the rim joist and the sill plate sitting below the first floor on top of the foundation wall. You might not see a nice clean area as electric wires may run along the sill plate, holes may have been drilled through the sill plate and stuff might be stored up there. Clean the Rim Joist area of sawdust, debris and dirt so that your sealant will stick properly and you have a nice place to work.
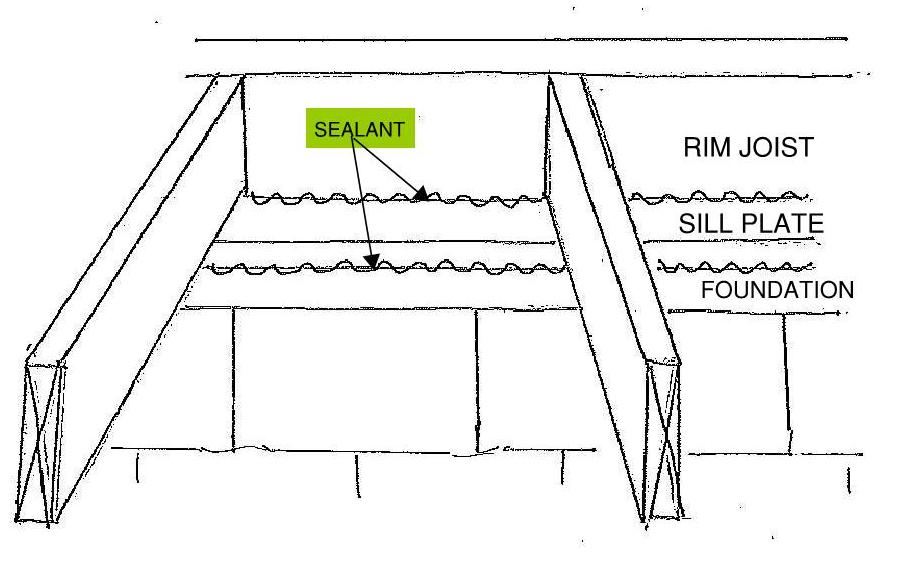
Second, seal the bottom of the joist at the Sill Plate and along the intersection of the Rim Joist and the Sill Plate with caulk or sealant. Don’t skimp, get a good quality sealant. Many people use spray foam for this but I prefer a non-petroleum based product with low-VOC’s. You may find holes that have been deliberatly drilled through the sill plate or through the foundation. These need to be sealed up. The size of the hole will determine the plug method. A fairly small hole may be plugged with sealant or caulk. A larger hole is a good candidate for spray foam. Don’t depend on the Rigid Foam insulation to plug holes, seal them before going on to the next step.
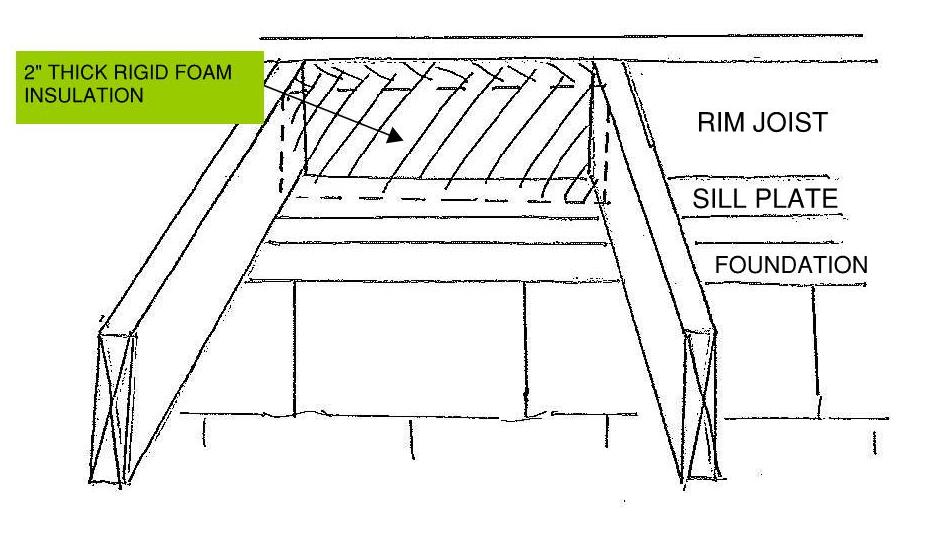
Third, cut a piece of 2″ Rigid Foam insulation that is about 1/4″ shorter and narrower than the joist bay and push it into place against the Rim Joist.
Fourth, seal all four sides of the insulation with caulk or sealant.
Follow this process all the way around the basement and the drafts in your house will be significantly reduced.


